
Installation guide
Read the safety notes before installing or using your Tire Backpack.
Specifications
- Mounting
- 2" hitch receiver, pin & clip
- Bolt pattern
- 110mm – 156mm
- Stabilizer
- 1 anti-rattle clamp
- Construction
- Heavy duty welded steel
- Weight
- ~20 lbs without tire
What's in the box
Take everything out and check it against this list before you start. Don't run the device with a part missing — replace it first.
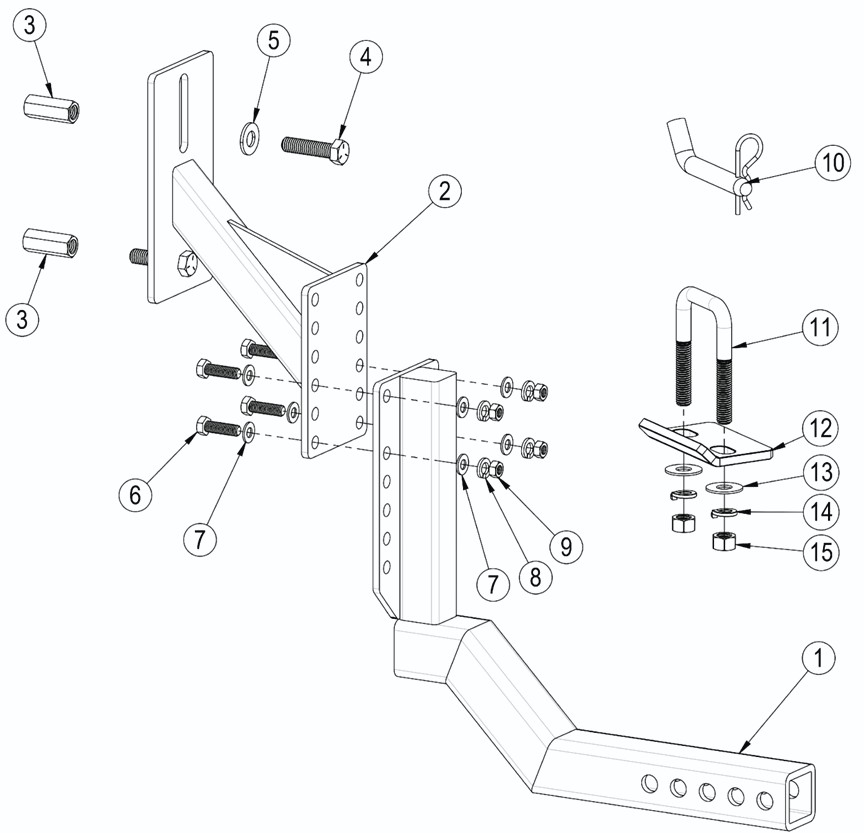
Bracket assembly
- 12" trailer hitch mounting bracket×1
- 2Adjustable tire mounting plate with 1/2" x 2" hex bolt×1
- 31/2" coupling nut×2
- 41/2" x 2" bolt×1
- 51/2" flat washer×1
- 63/8" x 1 1/4" hex bolt×4
- 73/8" flat washer×8
- 83/8" lock washer×4
- 93/8" nut×4
- 105/8" hitch pin with clip×1
Hitch stabilizer
- 11U-bolt×1
- 12Plate×1
- 13Washer×2
- 14Lock washer×2
- 15Nut×2
Assembly & installation
- 1
Pick the height
Hold both mounting plates against the back of the machine to choose the spare tire height.
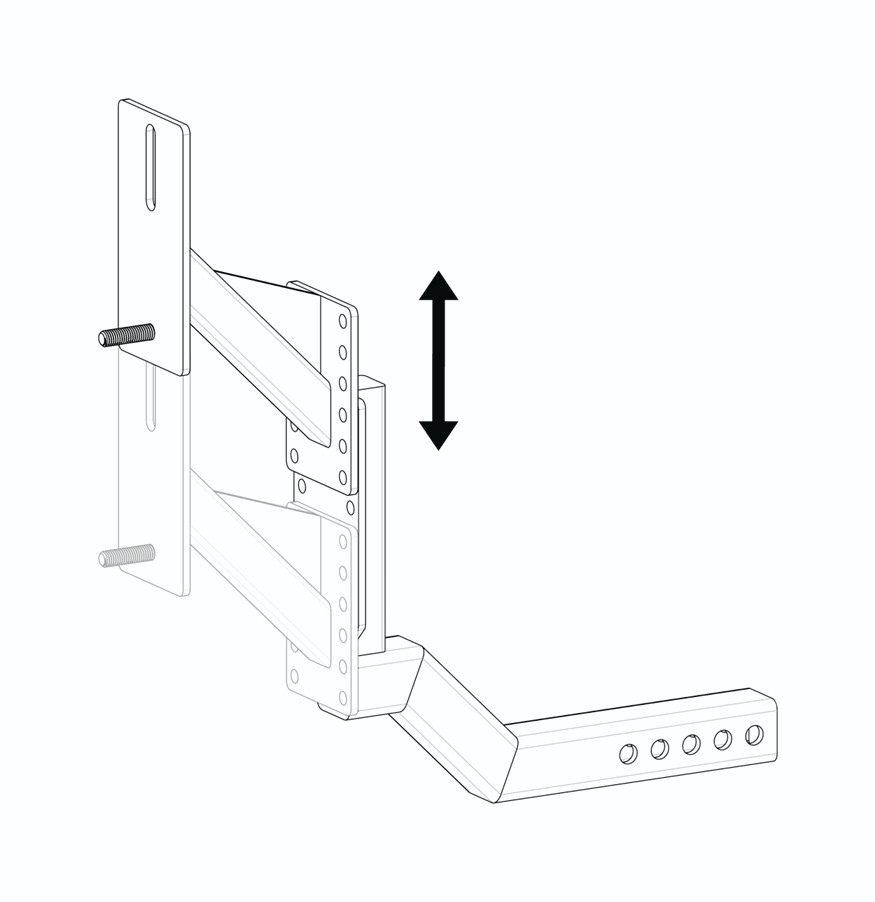
Figure 2 — height adjustment - 2
Bolt the plates together
Use the four 3/8" bolts and nuts with 8 washers and 4 lock washers to join the two mounting plates at the height you just chose.
Note · Space the bolts as far apart as the plates allow for the stiffest, most stable setup.
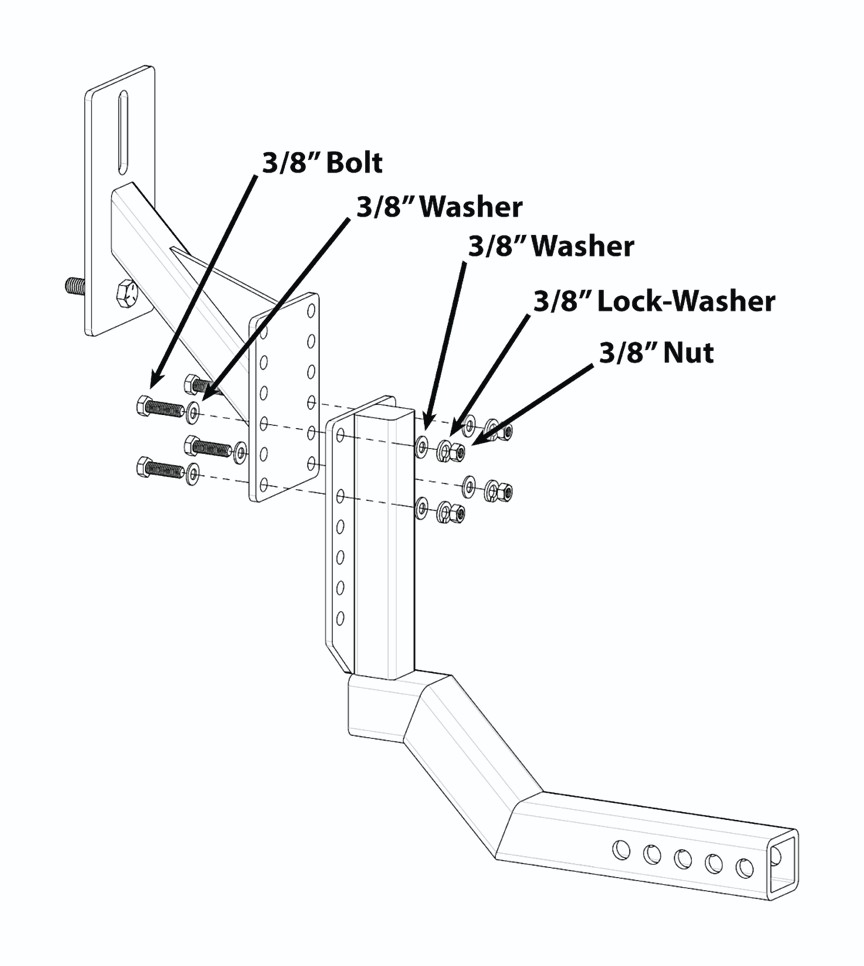
Figure 3 — plate hardware - 3
Drop it in the receiver
Slide the hitch bar into the machine's 2" receiver. Drop the pin and clip through the hole that leaves enough room behind the machine for the Tire Backpack.
Note · If the bar feels too long, cut it to length. Leave enough clearance to reach your storage compartments.
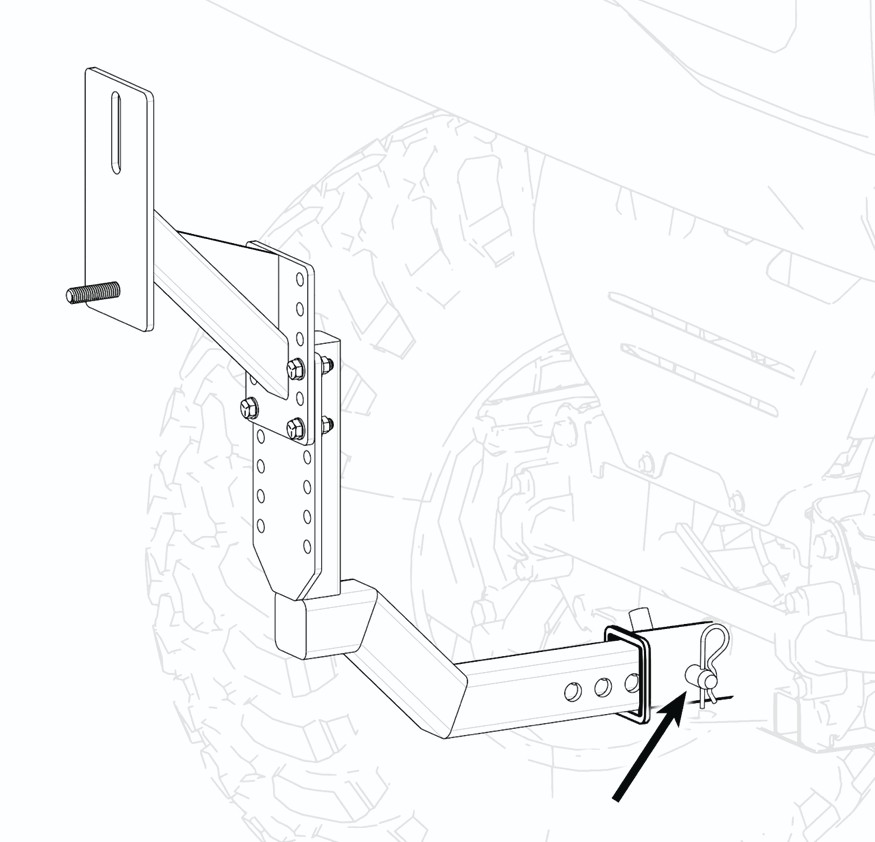
Figure 4 — hitch bar and pin 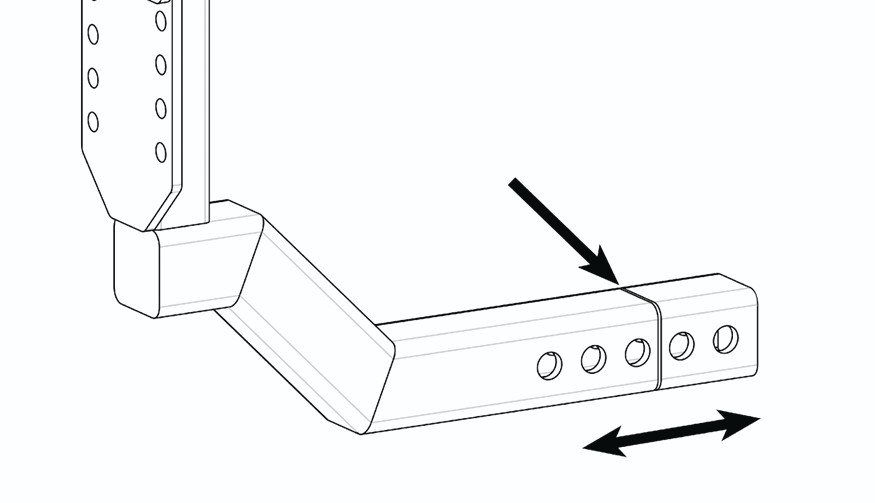
Figure 5 — bar length - 4
Mount the spare
Lift the spare tire onto the pre-welded bolt on the Tire Backpack mount and let it seat flat.
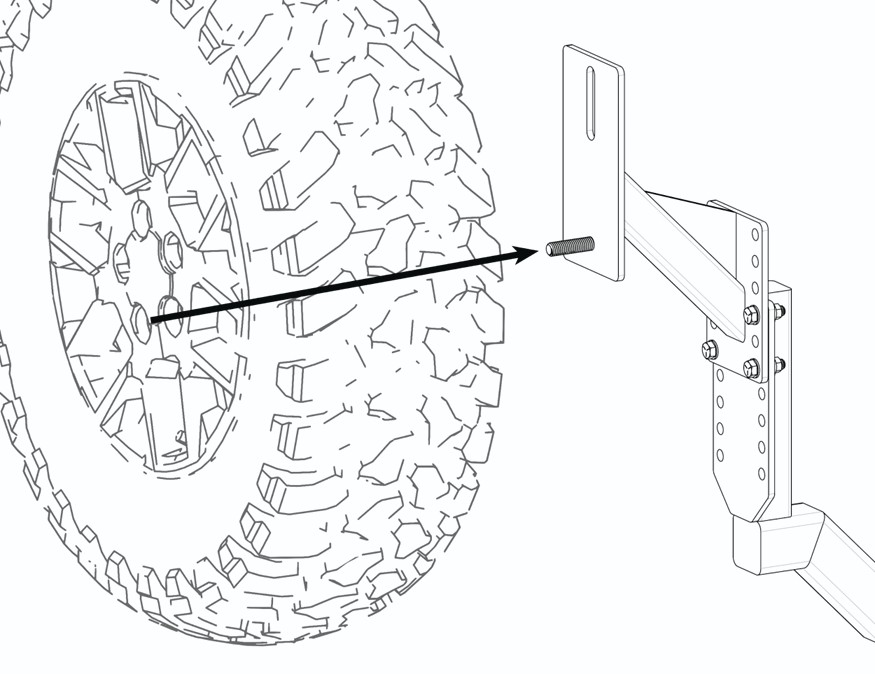
Figure 6 — tire onto the bolt - 5
Start the coupling nut
Thread the coupling nut on by hand until the tire is held and can't shift. Hand tight only at this stage.
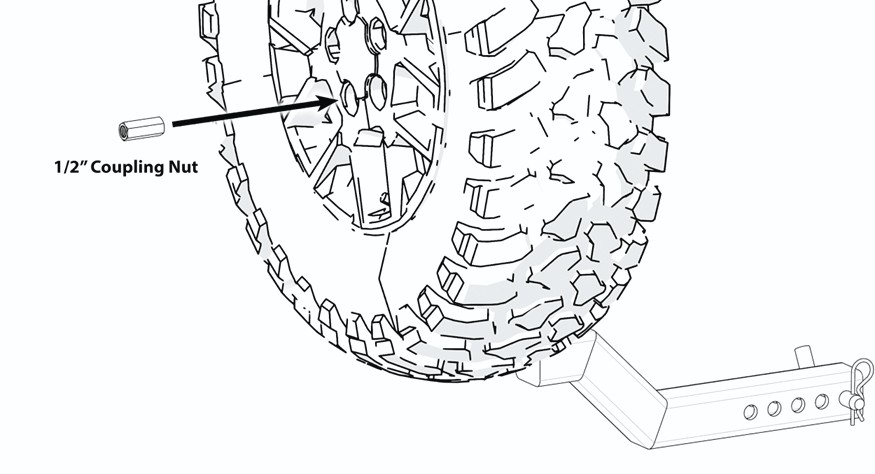
Figure 7 — coupling nut - 6
Torque it down
Fit the washer, then tighten the top and bottom coupling nuts to 75 ft-lbs of torque.
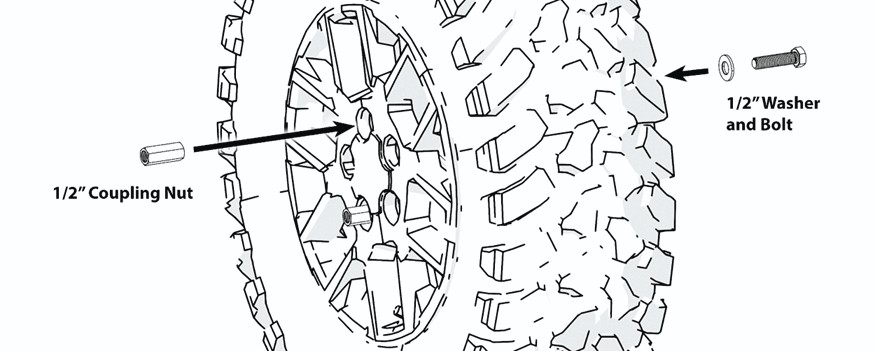
Figure 8 — washer and final torque - 7
Fit the hitch stabilizer (optional)
Fit the supplied hitch stabilizer around the bar to reduce movement and noise.
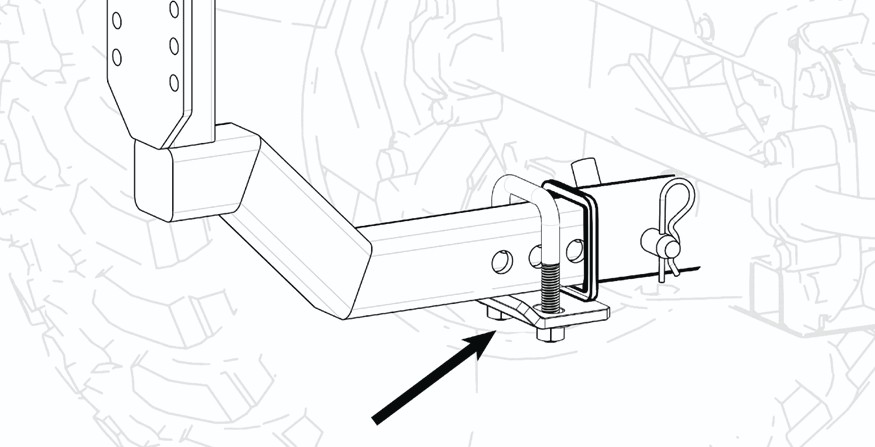
Figure 9 — hitch stabilizer
Before you ride
- A spare tire adds weight and length out back. Your machine will handle a little differently until you get the feel for it.
- No 2" receiver yet? Your ATV/UTV dealer can recommend the right hitch receiver adapter for your machine.
- Swap the supplied pin for a lockable pin if you want extra protection against theft.
- Make sure the tools to actually change a tire are on board before you head out.
- Bring a front tire size as your spare. A rear size fitted at the front may not fit in the wheel well.
- In rare cases a machine's front and rear wheels use different bolt patterns — check before you buy a spare.
The device was designed for one job — carry a spare. Don't modify or alter it, and don't use it for anything else. Inspect the components periodically for loosened nuts and bolts, and repair or replace anything damaged or worn.
Inspect
Check the mount over before each use — loose nuts and bolts, cracked, bent or broken parts.
Store
Sitting for a while? Thin coat of lubricant on the steel to keep rust off. Wipe it off before you ride again.
Support
Parts missing or something not working right? Email info@tirebackpack.com and we'll sort it.
Take the manual with you
Instruction manual · v1.01 · 12 pages